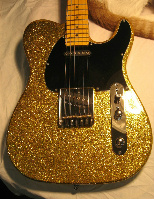
(Answer based on G&LDP posts submitted by: Tom Eskridge and Ken Baker)
The tool to use is called a wood reamer and is available at most any hardware store. No need to order one. But first, take off the control plate and look to see if your jack is held in place with a nut. If so, you will have to remove it. WARNING! DO NOT USE VICE GRIPS UNLESS ABSOLUTELY NECESSARY, as doing so will risk scratching your guitar!
After removing the internal nut (if any), insert the "pointy" end of the reamer into the jack just like you would the plug on your cord. Shove it in tight and turn the "T" shaped handle in a counter-clockwise direction. The teeth on the edges of the reamer will dig into the inside of the jack thereby forcing it to turn out and be removed.
You will most likely notice a string that has been inserted running the length of the jack. This string is used to give it a tighter fit in the models where an internal nut is not used. Before replacing the new jack run a short piece of kite string through the hole; leave plenty of extra length on the inside and outside (this can be trimmed later).
Replace the jack with another Switchcraft brand inline stereo jack available from well stocked music stores or electronics supply stores (editor's note: we'll try get the precise part number for the jack here shortly). DON'T FORGET THE FELT WASHER (if your guitar has one). When re-soldering, use a low-wattage iron (preferably a 30-watt iron), and be sure to use rosin core solder. The guys at Radio Shack can help with this.
"Seat" the new jack by driving it back into the hole with a rubber mallet - or, alternatively, you can use a regular hammer if you place something over the jack to protect it. Folded cloth, rubber, or cardboard will work.
Once you do it once, it's really easy and quick. The toughest part is accepting the fact that you will have to destroy the original jack in the removal process. Just remember that it's already ruined and cannot be fixed anyway.
Ken Baker recently updated his superb Picture 'step by step' ASAT Style Jack Replacement Tutorial (04/07/2010). (requires FREE Adobe Reader to view)
How do I remove the output jack from my ASAT-style guitar?
-
Craig

- Site Admin
- Posts: 11702
- Joined: Tue Mar 03, 2009 10:52 am
- Location: Either Coto De Caza, CA or Paso Robles, CA
How do I remove the output jack from my ASAT-style guitar?
Last edited by Craig on Wed Aug 24, 2011 11:42 am, edited 4 times in total.
Reason: Ken Baker updated his jack_replacement.pdf file, 4/7/2010
Reason: Ken Baker updated his jack_replacement.pdf file, 4/7/2010
-
Ken Baker

- Posts: 272
- Joined: Mon Feb 08, 2010 11:48 pm
- Location: Behind the Orange Curtain
Jack replacement procedure page update
For those interested, I have updated my jack replacement procedure page for G&L guitars & basses. This update reflects new links to outside pages at Switchcraft as well as upgrading older L-1500/1505/Climax basses to a power switching stereo jack.
That page can be found here:
http://www.bassesbyleo.com/jack_replacement.html
Ken...
That page can be found here:
http://www.bassesbyleo.com/jack_replacement.html
Ken...
-
darwinohm

- Posts: 3218
- Joined: Mon Mar 01, 2010 1:13 pm
- Location: Minneapolis/St Paul
Re: Jack replacement procedure page update
Great info Ken, thanks for sharing the update, especially on the stereo jack usage. --Darwin