First up - here is what the enclosure looked like out of the box - before I took the steel wool to it (prior to priming)...
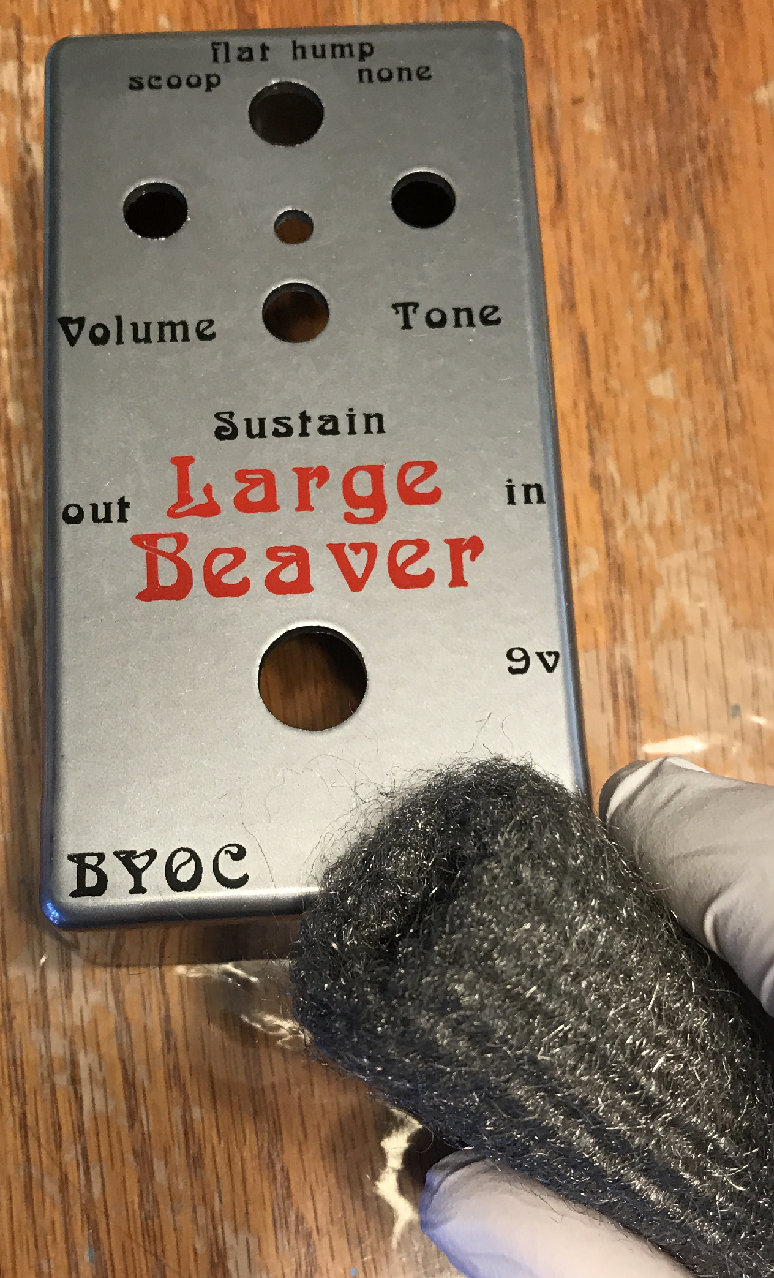
This took about half an hour, after which it looked like this:

At this point I wiped it down with a baby-wipe, so that it was ready for the Primer. I used an Acrylic Lacquer primer - It'll work on metal - just have to be sure you use the right sealant/finish when you're done. I'll be using a clear coat, but that comes later: My primer is a gray, and there
is not much difference in looks between it and the freshly steel wooled look, but it is what it is.
After the primer was dry (I did three or four coats), I started off with the white. I used a Canadian Tire version of "Toyota super White II" - which sounded the most promising for $10. the Nozzle was "spitty" - if you've done any spray painting before, you know what I'm talking about - big spits of paint every now and again, ruining your efforts so that you have to wait for it to dry, then buff out the spots, and try again. Not sure how many times I had to go at this - but here is what it looked like when I finally decided that was enough:

Actually this photo was taken in my basement under some poor lighting giving the enclosure a creamy color - but trust me it's not creamy in real life - it looks pretty glossy white.
I have to put a coat of clear on before I print off the decal, but I wanted to see if I got the decal size right, and printed off a test copy of what the final decal will look like...ish. This is just cheap printer paper, and a black ink only facsimile, the final will be in color on transfer paper, which I will bake onto the enclosure, then seal. but for now, this is just a size test.

Still in the basement under bad lighting, but you the size test looks good. You get an idea for how the graphic is going to look. The images, obviously are derivative of Gerald Scarfe's work from the movie "Pink Floyd - The Wall". I downloaded them this afternoon and modified them in order to make them work on my template. I am not profiting from the artwork, so as far as I know my use falls under the fair use clause for the copyright (not that anyone besides me likely cares).
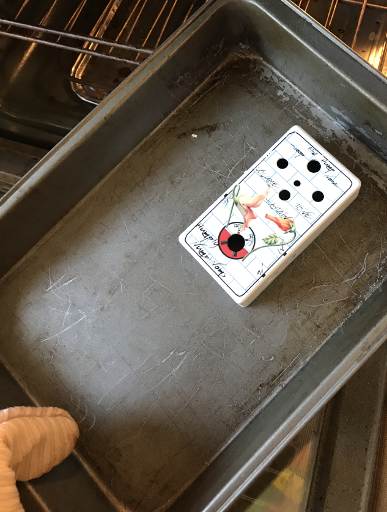
The last test is the knob test - I don't want the words on the decal to be covered by the knobs - so I place the knobs on the enclosure where they would approximately go, and that seems to be okay with me (see below):

I will do a decal on the back plate as well - where I plan to credit the artist, etc. - and include my "return to if lost/stolen" credentials. I don't have a color laser printer at home, but I have one at work, which I plan to use to print off the decals. Probably have the enclosure done by Tuesday. I'll post some pics when I have it done - and then I'll get to work on the electronics.
Stay Tuned -- I plan to update this post when I have the enclosure done, and make a second post for the electronics.
Although the pedal does a great job with Hendrix's fuzz sound - it apes Gilmour's sound from a bunch of albums - including the wall - so I went with that theme. I didn't come up with the idea to do a Pink Floyd themed chassis - rather I am copying someone else's cleverness, and just trying to make it a wee bit more "my own". So if you think it looks cool when it's done, don't think I'm to blame. What I am doing is more like a paint by number than an original, so if it turns out awesome, it'll be only because I copied someone else's great idea well.
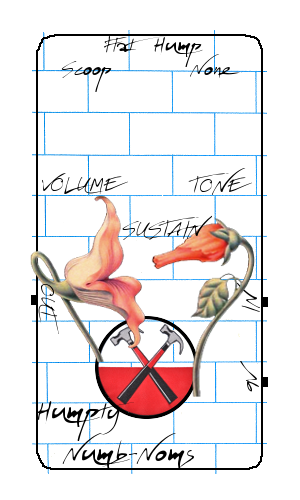
Sept 11 - printed out the colored version of the decal on decal transfer paper - I'm going to put it on the enclosure tonight - along with several coats of clear finish. Here is the colorized version of the decal:
Sept 12 - I'm done with the enclosure now.
The decal goes on much like you'd expect. After printing my design on the water slide decal paper - I cut it out, and put it in water for 60 seconds. Then I carefully slid the decal off the paper and onto my waiting, pre-moistened enclosure. That's an important step in the process because you are not likely to put it on perfectly the first try, so there needs to be some moisture under the decal to allow you to slide it into place.

When I had it centered where I wanted it I carefully and gently swept the air bubbles and wrinkles out from under the decal. Gently, in my case meant wetting a piece of card stock paper to soften it, then just as you'd sweep a broom across a floor, I swept the surface lightly and watched the wrinkles disappear. It's difficult to describe, but when you do it, you quickly get a feel for it. I was careful to keep the surface moist as I went along, dipping my fingers in water and lightly rubbing the water on the surface where I was sweeping to get the wrinkles out.
If you ever try this yourself, I would caution you with the knowledge that at this point it is terribly easy to scrape bits of your image off the decal - so err on the side of patience and gentleness, or you may easily mar your image and have to do the whole thing over again.
At that point, I wasn't sure if I should bake it first or cut out the holes (since the decal was draped over them). I decided to cut out the holes, and carefully (oh so carefully!) cut the moistened bits out with a razor knife.
Here is what it looked like at the end of the process. The light reflection on my table ended up yellowing out the color in the original photo, so I did my best to color correct it so that it looked as white as it really was:

At this point it was ready for the oven.
Now, just a word here: Water boils at 100 C, and what you want is get the water out of the decal, and seat it nicely on the enclosure without burning it. So I put it in the oven for about 12 minutes at about 110 C - here is what it looked like coming out of the oven:
 .
.I put a few coats of clear acrylic lacquer on after that, and didn't bother taking photos of the process. This is where I made my first mistake. I should have put a very, very light/thin coat on for the first coat - let it dry, then put a few more equally light coats on, allowing them to dry, before "going to town". The end result was that the color ran a bit on the flowers. It isn't so significant enough to trash it and start again mind you - but as a perfectionist I was irked by the err my own haste introduced.
Next up is the electronics. I won't be able to get to them tonight, as I have a meeting in the evening that'll take up my leisure hours. But I'll certainly get on that this week.