yet another set up comment
Sun Dec 15, 2013 10:47 am
I've read through all the set up posts, string heights, trem settings, nut cuts, etc etc etc. and I've come to one simple conclusion...I am not going to take a chance of F'n my favorite guitar by tweaking and turning this and that, hoping to get it right. There is a luthier on the south shore of Boston I've heard of, although I can't remember the name of the shop. When I do find it out, I'm taking my SC-3 to them. I have a larger than 3/8" gap between the bridge and body of the guitar that is causing the action to be a bit too high for my liking, so rather than mess with it, even with the awesome input of some of the posters here, I'll spend a few bucks to get it done right.
One other thing...in my avatar, you might have noticed that the tone knob is missing the silver insert. It came off at a gig, and it was a week before I noticed it. Is there a luthier supply shop on line that caters to G&L? I've checked (quickly) Stew-Mac, but didn't see the one I need. I'd like to keep the guitar as close to original as I can.
Peace.
Re: yet another set up comment
Sun Dec 15, 2013 1:44 pm
Jim,
Nobody around here is going to fault you for taking your SC-3 to a good tech for a setup. It is a skill that comes with patience and practice, preferably on something other than a Leo-era SC-3! If you do want to get the hang of it, I'd suggest finding a $50 beater locally and getting that into the most playable shape you can.
If you can't find the guy on the South Shore, you could contact Berklee and see if they recommend anybody to their students. Just a thought.
I don't know a source for the early SC/SB model knobs, but I've been looking as well. I picked up a rescue SC-2 last summer, which no longer has its original knobs. I have spoken with a few GbL old-timers, as well as local repairmen, with no good leads. I've checked electrical supply websites and found some new knobs that seem pretty close, but the minimum orders have been at least a thousand units. If you do find a source, please let me know.
Ken
Re: yet another set up comment
Sun Dec 15, 2013 3:12 pm
KenC wrote:Jim,
Nobody around here is going to fault you for taking your SC-3 to a good tech for a setup. It is a skill that comes with patience and practice, preferably on something other than a Leo-era SC-3! If you do want to get the hang of it, I'd suggest finding a $50 beater locally and getting that into the most playable shape you can.
If you can't find the guy on the South Shore, you could contact Berklee and see if they recommend anybody to their students. Just a thought.
I don't know a source for the early SC/SB model knobs, but I've been looking as well. I picked up a rescue SC-2 last summer, which no longer has its original knobs. I have spoken with a few GbL old-timers, as well as local repairmen, with no good leads. I've checked electrical supply websites and found some new knobs that seem pretty close, but the minimum orders have been at least a thousand units. If you do find a source, please let me know.
Ken
Thanks for the feedback Ken. Berklee is probably a good resource. I had a student I keep in contact with who teaches there. I might give him a shout. He plays jazz violin and mandolin, but he does pretty well doing gypsy jazz on guitar. He might have an idea.
As far as the knobs go, I spent some time today looking, without any luck. But I'll keep looking and let ya know if I find them.
Peace.
Re: yet another set up comment
Sun Dec 15, 2013 5:21 pm
I vote opposite. I think you have the mental and physical skills to do this set up properly. This guitar is old, it's been around, it's tough. You won't hurt it by trying to do a proper set up. Additionally, learning about, and spending time with this guitar will give you a bond absent when someone else does the set up. Put some towels on the dining room table and take the dang thing apart, then start from scratch. If it doesn't work out, do it again. You're wife will hate you for taking up the space for days, but hey, that's what fast food is for. If you get in trouble with her, blame it on me, I'm used to it.
I'm telling you this ability is in you given time and patience with yourself. I know this because little more than 10 years ago I joined this site after obtaining a G&L. I knew nothing but learned from everybody. Now I am sitting at my table repairing, modding, and setting up guitars for others who are too afraid to do it themselves, and that's the truth. Go for it!
You can't break that guitar, I know because they let me play them!
Have some fun today
Re: yet another set up comment
Sun Dec 15, 2013 5:32 pm
Pretty sure me tech just turned the two outer screws on the bridge to raise or lower the bridge , it only took a second for him to adjust it for the string height I wanted , he gave one side a 1/4 more turn to level the strings while measuring with a ruler
Re: yet another set up comment
Sun Dec 15, 2013 8:38 pm
Zippy wrote:I vote opposite. I think you have the mental and physical skills to do this set up properly. This guitar is old, it's been around, it's tough. You won't hurt it by trying to do a proper set up. Additionally, learning about, and spending time with this guitar will give you a bond absent when someone else does the set up. Put some towels on the dining room table and take the dang thing apart, then start from scratch. If it doesn't work out, do it again. You're wife will hate you for taking up the space for days, but hey, that's what fast food is for. If you get in trouble with her, blame it on me, I'm used to it.
I'm telling you this ability is in you given time and patience with yourself. I know this because little more than 10 years ago I joined this site after obtaining a G&L. I knew nothing but learned from everybody. Now I am sitting at my table repairing, modding, and setting up guitars for others who are too afraid to do it themselves, and that's the truth. Go for it!
You can't break that guitar, I know because they let me play them!
Have some fun today
lol.. thanks for the vote of confidence. I have done stuff like this before...I pulled the wiring out of my tele and rewired new pots and switch. I took me two tries, but I got it right finally. Stuffed new carvin single coils in my strat. Got that one the first time. Refinished and rewired an old Crown LP knock-off from the 60's that turned out ok.
And you have the wife thing right. I'd have to move the operation into the cellar work area. lol She already doesn't understand why I need more then one guitar! (presently 9 if you count the one in pieces in the cellar) Hint: don't make the "why do you have 40 pairs of shoes?" .. argument.
I'm tempted to give it a try. We'll see.
Thanks again.
Peace
Re: yet another set up comment
Sun Dec 15, 2013 8:47 pm
Fumble fingers wrote:Pretty sure me tech just turned the two outer screws on the bridge to raise or lower the bridge , it only took a second for him to adjust it for the string height I wanted , he gave one side a 1/4 more turn to level the strings while measuring with a ruler
Thanks for the advice. I think, though, that the problem causing the high action is not the two mounting pins of the bridge. The specs call for 3/8 " gap between the bottom of the bridge and the body of the guitar. Right now the gap is significantly more then this. Also, the bridge should be level with the body. This in not the case with my guitar. The bridge seems to be pulled too high from the tension of the strings. I would guess that the tension on the tremelo springs would need to be adjusted to pull the bridge back down to that level position. I've read at least one post here that says that it is rarely the mounting pins as you suggest, although the post did mention that it can be. If the bridge were already level, I think your solution would be the ticket. Thanks for the input. Every little bit I learn from the boards makes me more confident I can solve this.
Peace.
Last edited by Jim Rennie on Mon Dec 16, 2013 7:34 am, edited 1 time in total.
Re: yet another set up comment
Sun Dec 15, 2013 9:33 pm
Jim Rennie wrote: The specs call for 3/8 " gap between the bottom of the bridge and the body of the guitar.
You mean 3/16", right?
The easiest way to get everything in balance is to follow the setup instructions step by step .
I would expect that you will be adjusting everything from spring claw to saddle height, the setup instructions guide you through it so you don't have to go backwards (though there is a little trial and error at times, it's part of the learning curve).
Re: yet another set up comment
Sun Dec 15, 2013 10:51 pm
Elwood wrote:Jim Rennie wrote: The specs call for 3/8 " gap between the bottom of the bridge and the body of the guitar.
You mean 3/16", right?
The easiest way to get everything in balance is to follow the setup instructions step by step .
I would expect that you will be adjusting everything from spring claw to saddle height, the setup instructions guide you through it so you don't have to go backwards (though there is a little trial and error at times, it's part of the learning curve).
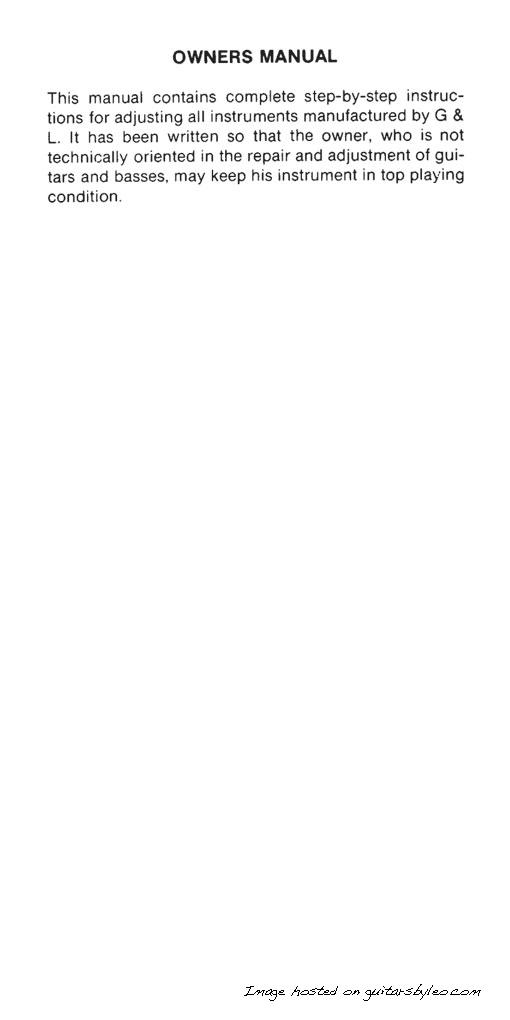
This is the G&L Owner's Manual you should be following: Album: Owner's Manual, Version 2.
I agree with Zippy, you can do it. Here is the Intro page:
Re: yet another set up comment
Mon Dec 16, 2013 3:14 am
Elwood is right on the trial and error thing with the trem set up. You're going to plug into your tuner and get a phillips screwdriver. Make sure you have all 3 springs on in the correct order. That guitar has two different spring rates. In the set up guide it will state which goes in the middle because I can't remember. I think the more bronze one. Anyway, the two identical ones go on the outside spring positions. Of course, set this up with the brand and gauge strings you're always going to use. If you change to a different gauge or sometimes a different brand of strings, or adjust the relief in the neck, you will want to do this all over again or at least check it over.
Now, tune the guitar and look at the bridge. Imagine the strings and springs are people on opposite ends of a teeter totter with the bridge being the center spot. When in tune, if the back of the bridge sits higher than the front, loosen the strings just a turn or so and give each screw in the trem claw in the back cavity about half a turn in towards the front of the body. Re tune and check it again. Keep fiddling with it until the bridge is level. Once it's level, adjust it's height with the two allen head bolts on each side of the bridge. After adjusting the height, check again to make sure it's still level.
Now, you have to adjust your saddle heights and then intonate because everybody got moved around. Make sure use a radius gauge on your strings. Just make one with a pen, string, and some cardboard if you don't have a real one. It'll still work just fine.
Note: I've seen folks in the past get really anal about wanting the trem claw (the metal thing screwed into the back cavity attached to the springs) to be perfectly parallel to the body cavity. I've found usually, if observant, one side pulls slightly more than the other for some reason. It's OK to have one side in a little more than the other if that makes your guitar balance perfectly.
Have fun and good luck down in the basement. Also, great job on those other guitars. Some of those are not easy jobs.
Zippy
Re: yet another set up comment
Mon Dec 16, 2013 7:39 am
Elwood wrote:Jim Rennie wrote: The specs call for 3/8 " gap between the bottom of the bridge and the body of the guitar.
You mean 3/16", right?
The easiest way to get everything in balance is to follow the setup instructions step by step .
I would expect that you will be adjusting everything from spring claw to saddle height, the setup instructions guide you through it so you don't have to go backwards (though there is a little trial and error at times, it's part of the learning curve).
Thanks Elwood...I taught English for 31 years and avoided math my whole life. lol Thanks for the heads up on the mix up there. I would have been here in a week asking "WHAT DID I DO WRONG? All with the necessary look of panic on my face.
Re: yet another set up comment
Mon Dec 16, 2013 7:42 am
The easiest way to get everything in balance is to follow the setup instructions step by step .
I would expect that you will be adjusting everything from spring claw to saddle height, the setup instructions guide you through it so you don't have to go backwards (though there is a little trial and error at times, it's part of the learning curve).[/quote]
This is the G&L Owner's Manual you should be following: Album: Owner's Manual, Version 2.
I agree with Zippy, you can do it. Here is the Intro page:
 .
.
 [/quote]
Thanks to you Craig! I'm kinda liking that I wandered in to this bar. Lots of friendly, knowledgeable people. Bartender... Drinks for everyone!
Peace
I would expect that you will be adjusting everything from spring claw to saddle height, the setup instructions guide you through it so you don't have to go backwards (though there is a little trial and error at times, it's part of the learning curve).[/quote]
This is the G&L Owner's Manual you should be following: Album: Owner's Manual, Version 2.
I agree with Zippy, you can do it. Here is the Intro page:
Thanks to you Craig! I'm kinda liking that I wandered in to this bar. Lots of friendly, knowledgeable people. Bartender... Drinks for everyone!
Peace
Re: yet another set up comment
Wed Dec 18, 2013 10:26 am
OK...I've read the feedback...I've looked over the manual (thanks Craig)...I've weighed my options...I've checked my finances...I've gotten clearance from the wife ( probably the largest hurdle to clear)...and I've made my decision. I'm going to tackle the complete factory spec set-up from start to finish. Purchased new strings last evening, cleared the work bench in the cellar with a nice blanket covering the surface, located the necessary tools (ball peen hammer, chisel, 4" hole cutting drill bit, vice grips), and camera to document the journey. Project starts tomorrow AM. Wish me luck boys...I'm going in! Now... where did I put that cross-cut saw?
Re: yet another set up comment
Wed Dec 18, 2013 10:37 am
I like it!!! -- Darwin
Re: yet another set up comment
Wed Dec 18, 2013 11:07 am
One word of caution, in case it's not obvious and hasn't been mentioned before. Have a spacer under the back lip of the DFV before you start loosening strings. It should just slide in between the lip and the body when the strings are at pitch. I've used bits of soft wood that were scraps from woodworking projects, and I think I've also wrapped a bit of cloth from a t-shirt around a popsicle stick once. The idea is just to keep the DFV's lip from coming down on the top of the guitar when string tension is removed, as that can damage the finish.
Ken
Ken
Re: yet another set up comment
Wed Dec 18, 2013 11:11 am
One more thing: if you decide to remove the neck or need to use the micro-tilt, very gently work the corner of a razor blade around the joint between the neck and the body first. If they have been together tightly for 25 years, there's a chance that the finishes could have bonded together. Working the razor around the joint first should prevent small bits of body finish from coming off with the neck.
I learned this the hard way on my near-mint '82 SC-2...which is a tiny bit farther from mint than it was before...
Ken
I learned this the hard way on my near-mint '82 SC-2...which is a tiny bit farther from mint than it was before...
Ken
Re: yet another set up comment
Wed Dec 18, 2013 12:48 pm
Don't forget the belt sander to smooth out the marks from the cross cut saw. Start with 60 grit. 
You won't regret it. It is very rewarding. My Legacy was off by a mile. Intonation, buzzing, saddles too low, high at the nut.... Had a lemon and now it plays like a dream and I did it with the help of this forum. Have fun!
You won't regret it. It is very rewarding. My Legacy was off by a mile. Intonation, buzzing, saddles too low, high at the nut.... Had a lemon and now it plays like a dream and I did it with the help of this forum. Have fun!
Re: yet another set up comment
Wed Dec 18, 2013 5:45 pm
Jim Rennie wrote:OK...I've read the feedback...I've looked over the manual (thanks Craig)...I've weighed my options...I've checked my finances...I've gotten clearance from the wife ( probably the largest hurdle to clear)...and I've made my decision. I'm going to tackle the complete factory spec set-up from start to finish. Purchased new strings last evening, cleared the work bench in the cellar with a nice blanket covering the surface, located the necessary tools (ball peen hammer, chisel, 4" hole cutting drill bit, vice grips), and camera to document the journey. Project starts tomorrow AM. Wish me luck boys...I'm going in! Now... where did I put that cross-cut saw?
Good luck, I have been learning more of this as I go along.. I recently setup a band mates guitar that was buzzing etc... I gave it back to him and he says it plays a lot better... So it can be done.. I think the hardest thing for me is to get a nut right.. still working on that...
I do electronic stuff well enough.. I think having a good 32nd and 64th ruler from stew mac is a good idea.. I also picked up some guitar string radius guides on ebay for $20 (which I used on the legacy I just bought). They worked great and the setup was pretty spot on at the bridge...
Mark
Re: yet another set up comment
Wed Dec 18, 2013 5:53 pm
KenC wrote:One word of caution, in case it's not obvious and hasn't been mentioned before. Have a spacer under the back lip of the DFV before you start loosening strings. It should just slide in between the lip and the body when the strings are at pitch. I've used bits of soft wood that were scraps from woodworking projects, and I think I've also wrapped a bit of cloth from a t-shirt around a popsicle stick once. The idea is just to keep the DFV's lip from coming down on the top of the guitar when string tension is removed, as that can damage the finish.
Ken
It's actually mentioned in the User's Manuals and was recently discussed in this post: How to Avoid Damage from Tremolo on Pull?.
Re: yet another set up comment
Thu Dec 19, 2013 6:41 am
Craig wrote:It's actually mentioned in the User's Manuals and was recently discussed in this post: How to Avoid Damage from Tremolo on Pull?.
I think that is pretty standard practice for any floating tremolo I would assume... a good practice..
Re: yet another set up comment
Thu Dec 19, 2013 11:20 am
I actually use a pad of post-it type notes.MAP70 wrote:Craig wrote:It's actually mentioned in the User's Manuals and was recently discussed in this post: How to Avoid Damage from Tremolo on Pull?.
I think that is pretty standard practice for any floating tremolo I would assume... a good practice..
I just tear off enough to match the height of the bridge off the deck and slide it under.
Re: yet another set up comment
Thu Dec 19, 2013 8:07 pm
bloodied_fingers wrote:I actually use a pad of post-it type notes.MAP70 wrote:Craig wrote:It's actually mentioned in the User's Manuals and was recently discussed in this post: How to Avoid Damage from Tremolo on Pull?.
I think that is pretty standard practice for any floating tremolo I would assume... a good practice..
I just tear off enough to match the height of the bridge off the deck and slide it under.
Great idea!!!
Re: yet another set up comment
Mon Dec 23, 2013 6:48 pm
MAP70 wrote:bloodied_fingers wrote:I actually use a pad of post-it type notes.MAP70 wrote:Craig wrote:It's actually mentioned in the User's Manuals and was recently discussed in this post: How to Avoid Damage from Tremolo on Pull?.
I think that is pretty standard practice for any floating tremolo I would assume... a good practice..
I just tear off enough to match the height of the bridge off the deck and slide it under.
Great idea!!!
I agree...great idea...infinitely adjustable and cheap...going to use this method. That's 'going'...I had planned to have this project of set up half done, but the Christmas season has thrown a monkey wrench into those works. Perhaps after the holidays. lol
Re: yet another set up comment
Mon Dec 23, 2013 6:53 pm
Jim Rennie wrote:I agree...great idea...infinitely adjustable and cheap...going to use this method. That's 'going'...I had planned to have this project of set up half done, but the Christmas season has thrown a monkey wrench into those works. Perhaps after the holidays. lol
yeah it's killing me too... luckilly I got it done before...
Mark